

Driveway sliding gates are a classic way to express your style and wealth. Not only a way to show your regality, but a gated driveway can also be an old friend reminding you of nostalgic memories with your beautiful home and long-standing fences that stand the test of time. The installation of a stunning and architecturally suitable sliding gate will create a magnificent entry at the end of your driveway.
PREPARATION FOR THE INSTALLATION.
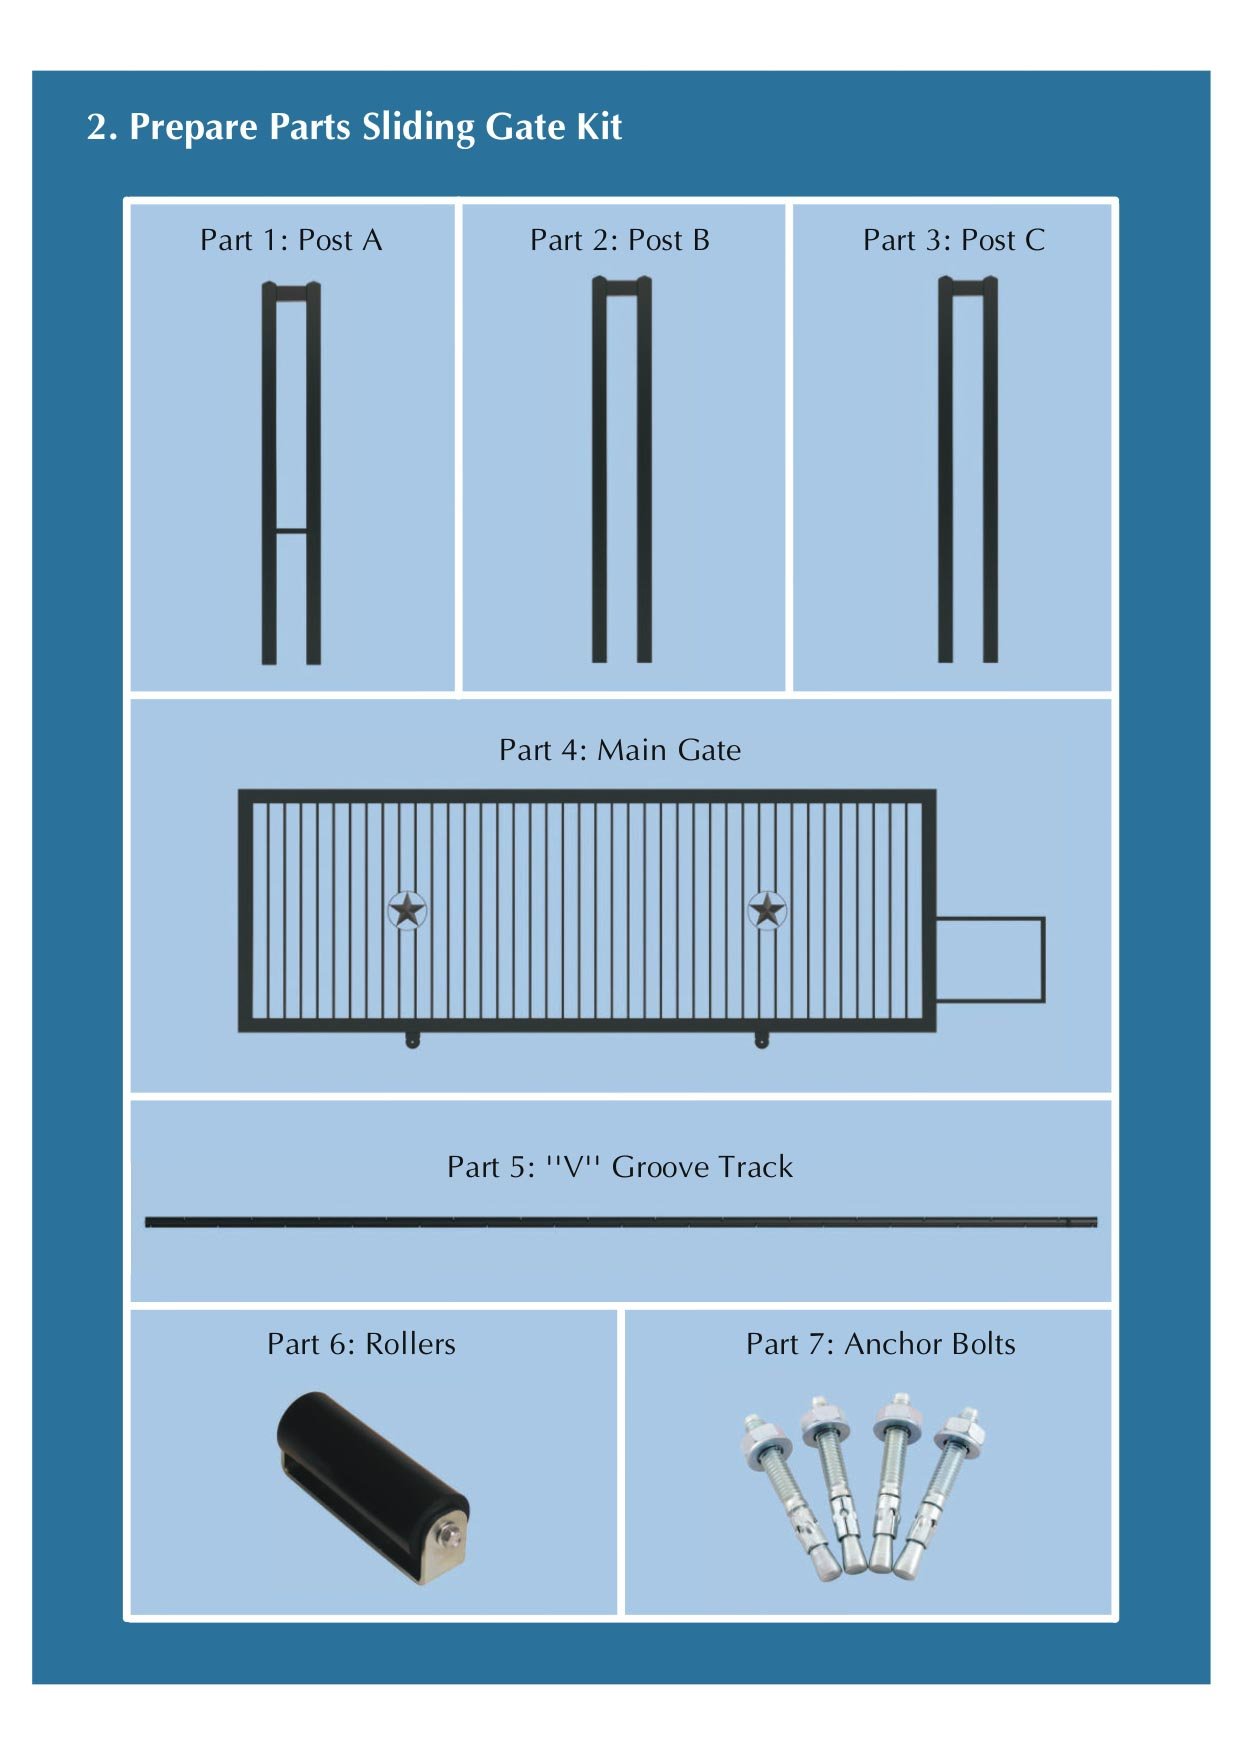
To install a sliding gate, be sure to prepare the sliding gate kit and the accessories.
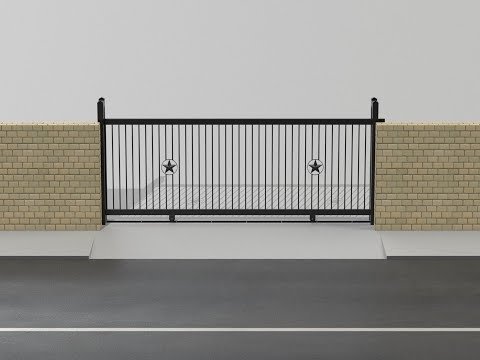
A sliding gate kit from Metal Solutions includes 7 parts that are illustrated in the picture below:
As for the accessories, the required ones include:
Sliding Gate Instruction
1. Hammer
2. Trowel
3. One wheel trolley
4. Concrete 3/8” drill bit
5. Hammer drill machine
6. String line level
7. Levelling instrument ruler
8. Straight ruler
9. Spray paint
10. String
11. Shovel
12. Oil spray bottle gun

Since the aforementioned items ensure that the installation process goes as smoothly and quickly, you have to prepare all the necessary accessories.
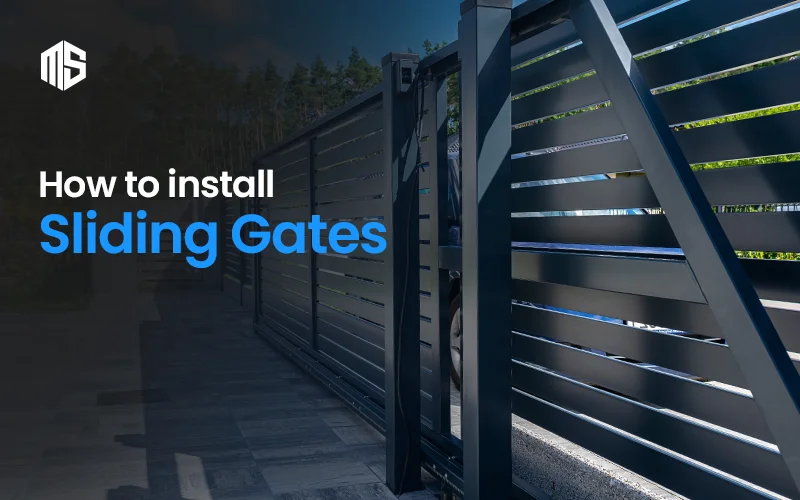
INSTALLING SLIDING GATE
The installation of a sliding driveway from Meta Solutions includes 4 key steps. These processes will be carefully guided by the following instructions, which you can follow easily to complete your project.
1/ Setting Your Terminal Posts
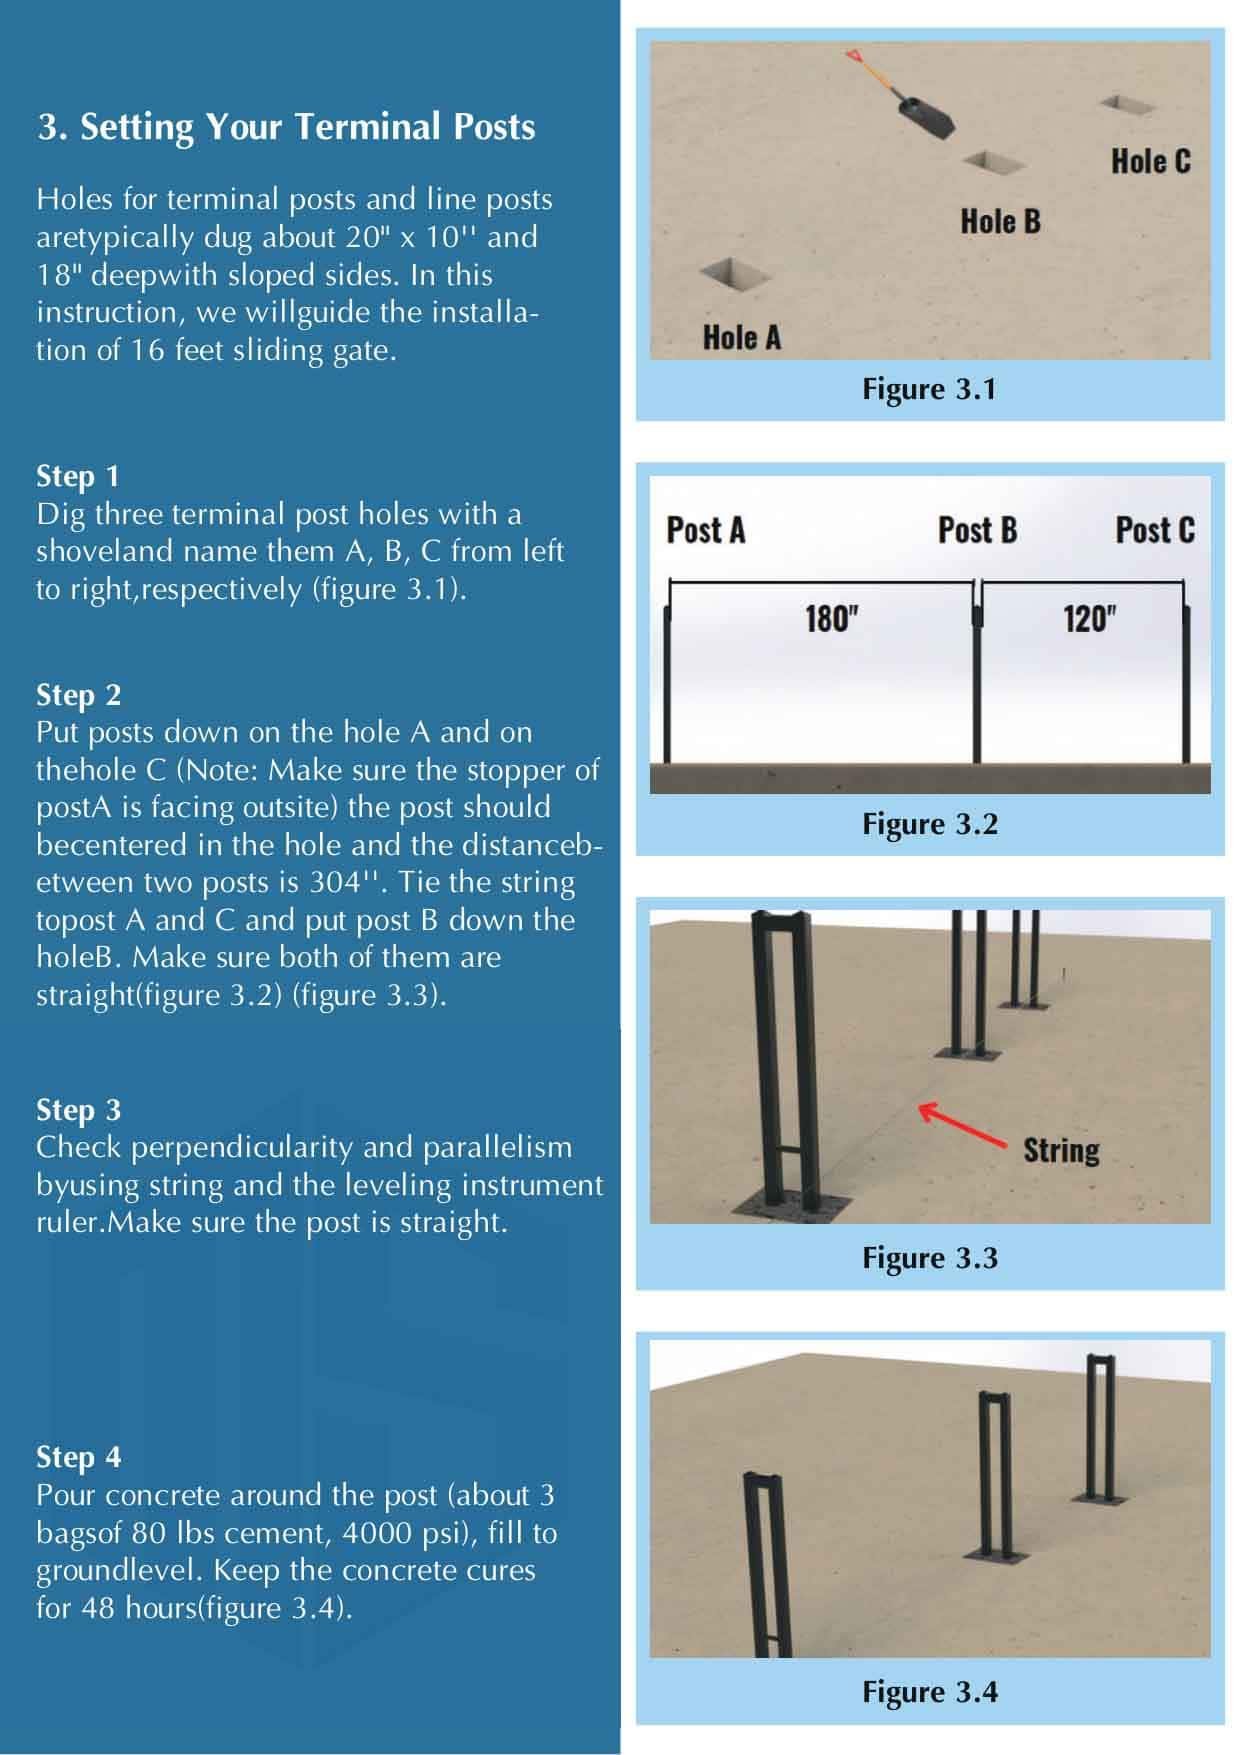
With sloped sides, terminal and line post holes are normally 20″ x 10″ in size and 18″ deep. In this instruction, we will guide you to the installation of a 16-feet sliding gate.
Step 1: With a shovel, dig three terminal post holes and label them A, B, and C, from left to right.
Step 2: Put posts down on hole A and hole C. The post should be centered in the hole. When putting the post down, make sure that the stopper of post A is facing outside. Tie the string to post A and C and put post B down the hole B. Make sure both of them are straight
The distance of posts A, B, C must follow the illustration below:
Step 3: Using a string and a leveling instrument ruler to check for perpendicularity and parallelism. Check to see if the post is straight.
Step 4: Fill to ground level with concrete (about 3 bags of 80-pound cement, 4000 psi). Allow 48 hours for the concrete to cure.
A little-known fact about pouring is that there are two types: A wetting technique that requires you to mix up some materials before starting; as well as tamping where all ingredients need to be at room temperature or warmer so they can harden together quickly after being mixed into a cohesive mass. In either case, though, make sure your surroundings stay clear from interference.
2/ Install “V” Groove Track
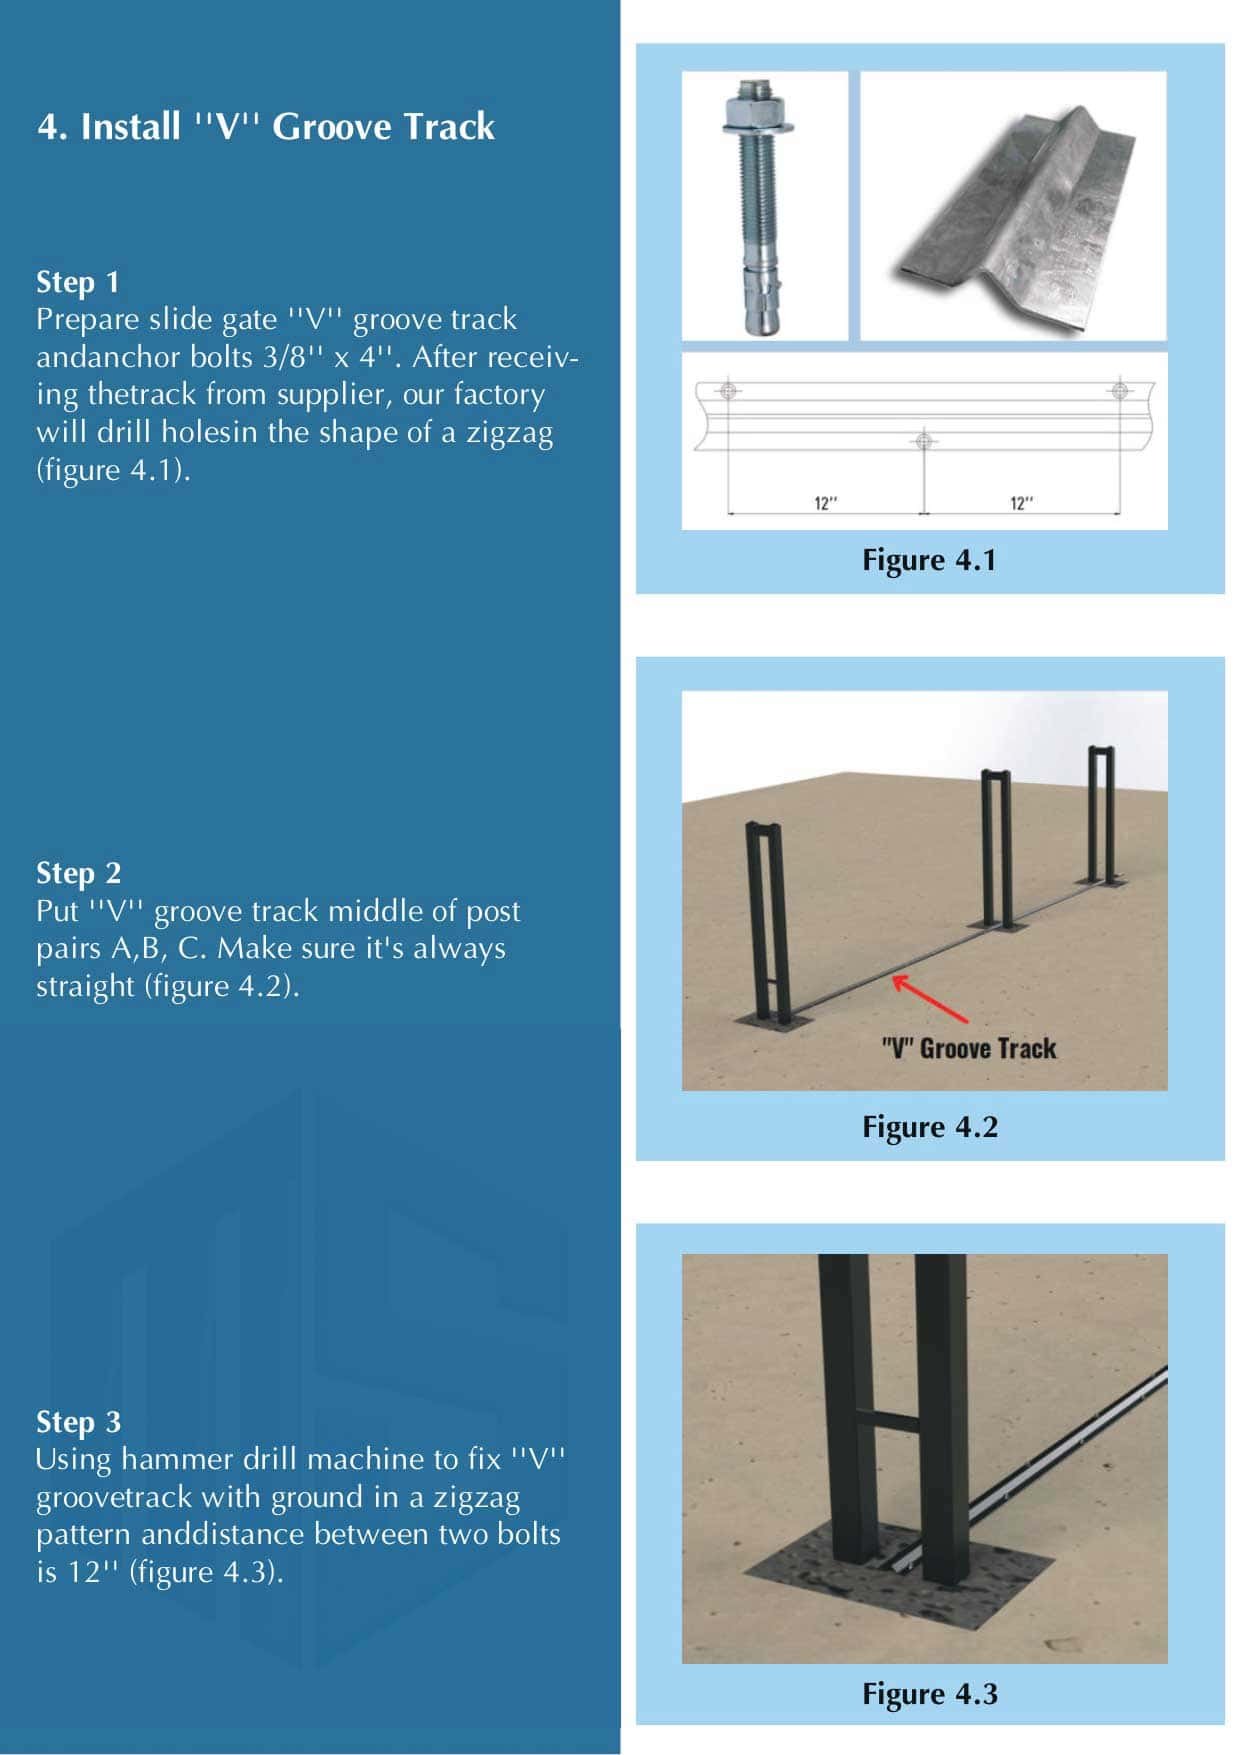
Step 1: Prepare the “V” groove track for the sliding gate and 3/8″ x 4″ anchor bolts. Our factory will drill holes in the shape of a zigzag after receiving the track from the supplier.
Step 2: Put the ”V” groove track in the middle of post pairs A, B, and C. Make sure it is always straight
Step 3: Fixing a “V” groove track with the ground in a zigzag pattern with a hammer drill machine, with a gap between two bolts of 12″
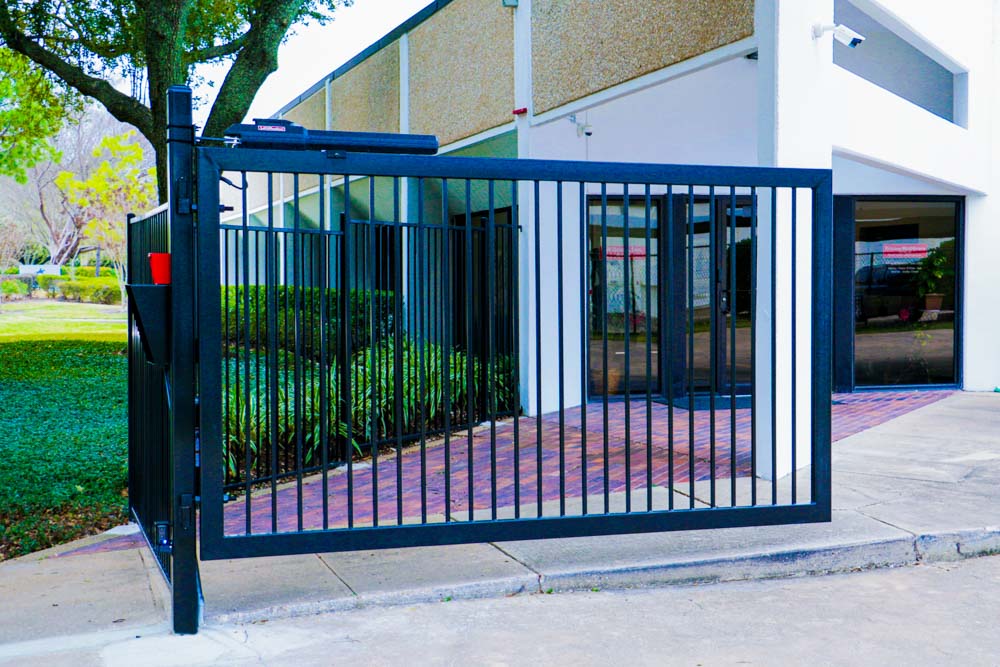
3/ Install Sliding Gate
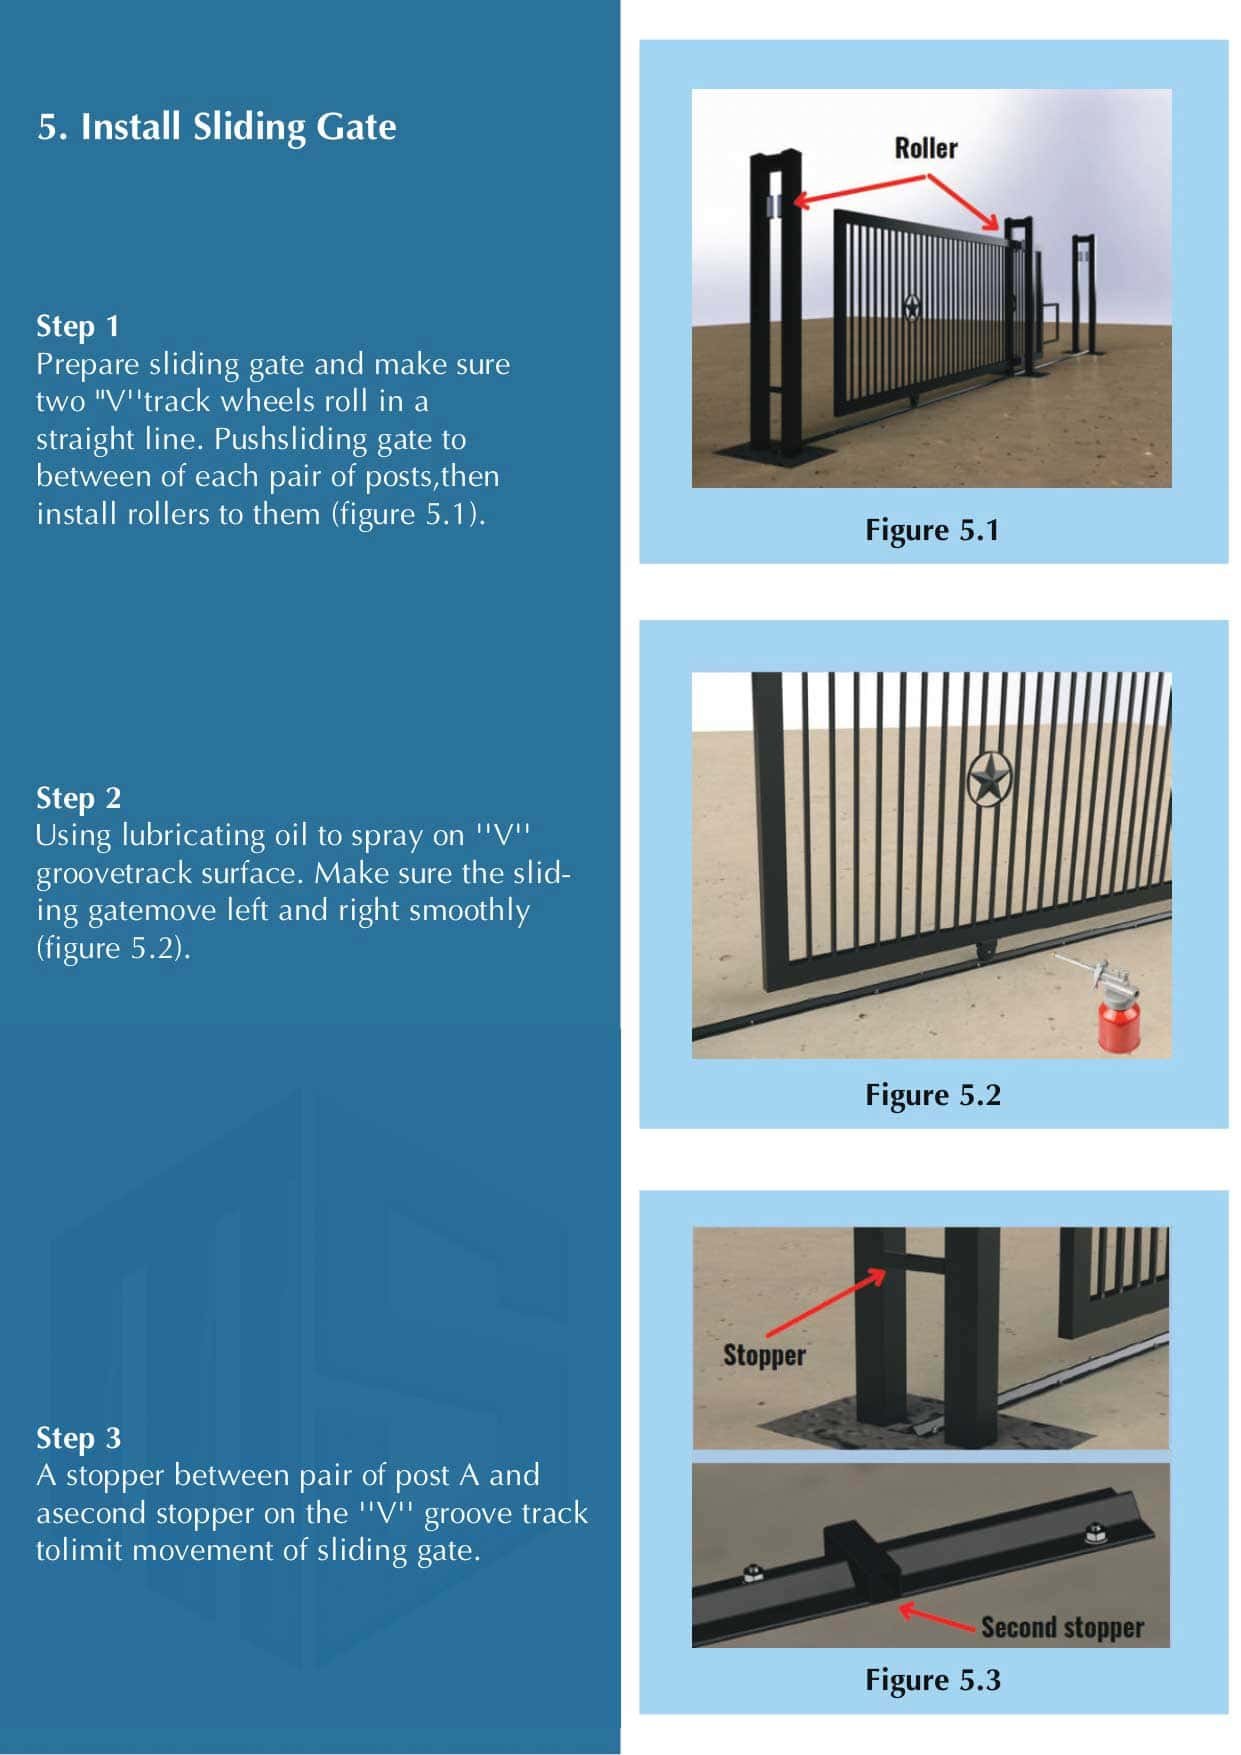
Step 1: Prepare the sliding outdoor gate and make sure two “V’ ‘track wheels roll in a straight line. Push sliding outdoor gate between each pair of posts, then install rollers on them
Step 2: Spraying lubricating oil over the surface of the “V” groove track. Make sure the sliding gate moves left and right smoothly
Step 3: A stopper between a pair of post A and a second stopper on the ”V” groove track to limit movement of the sliding gate.
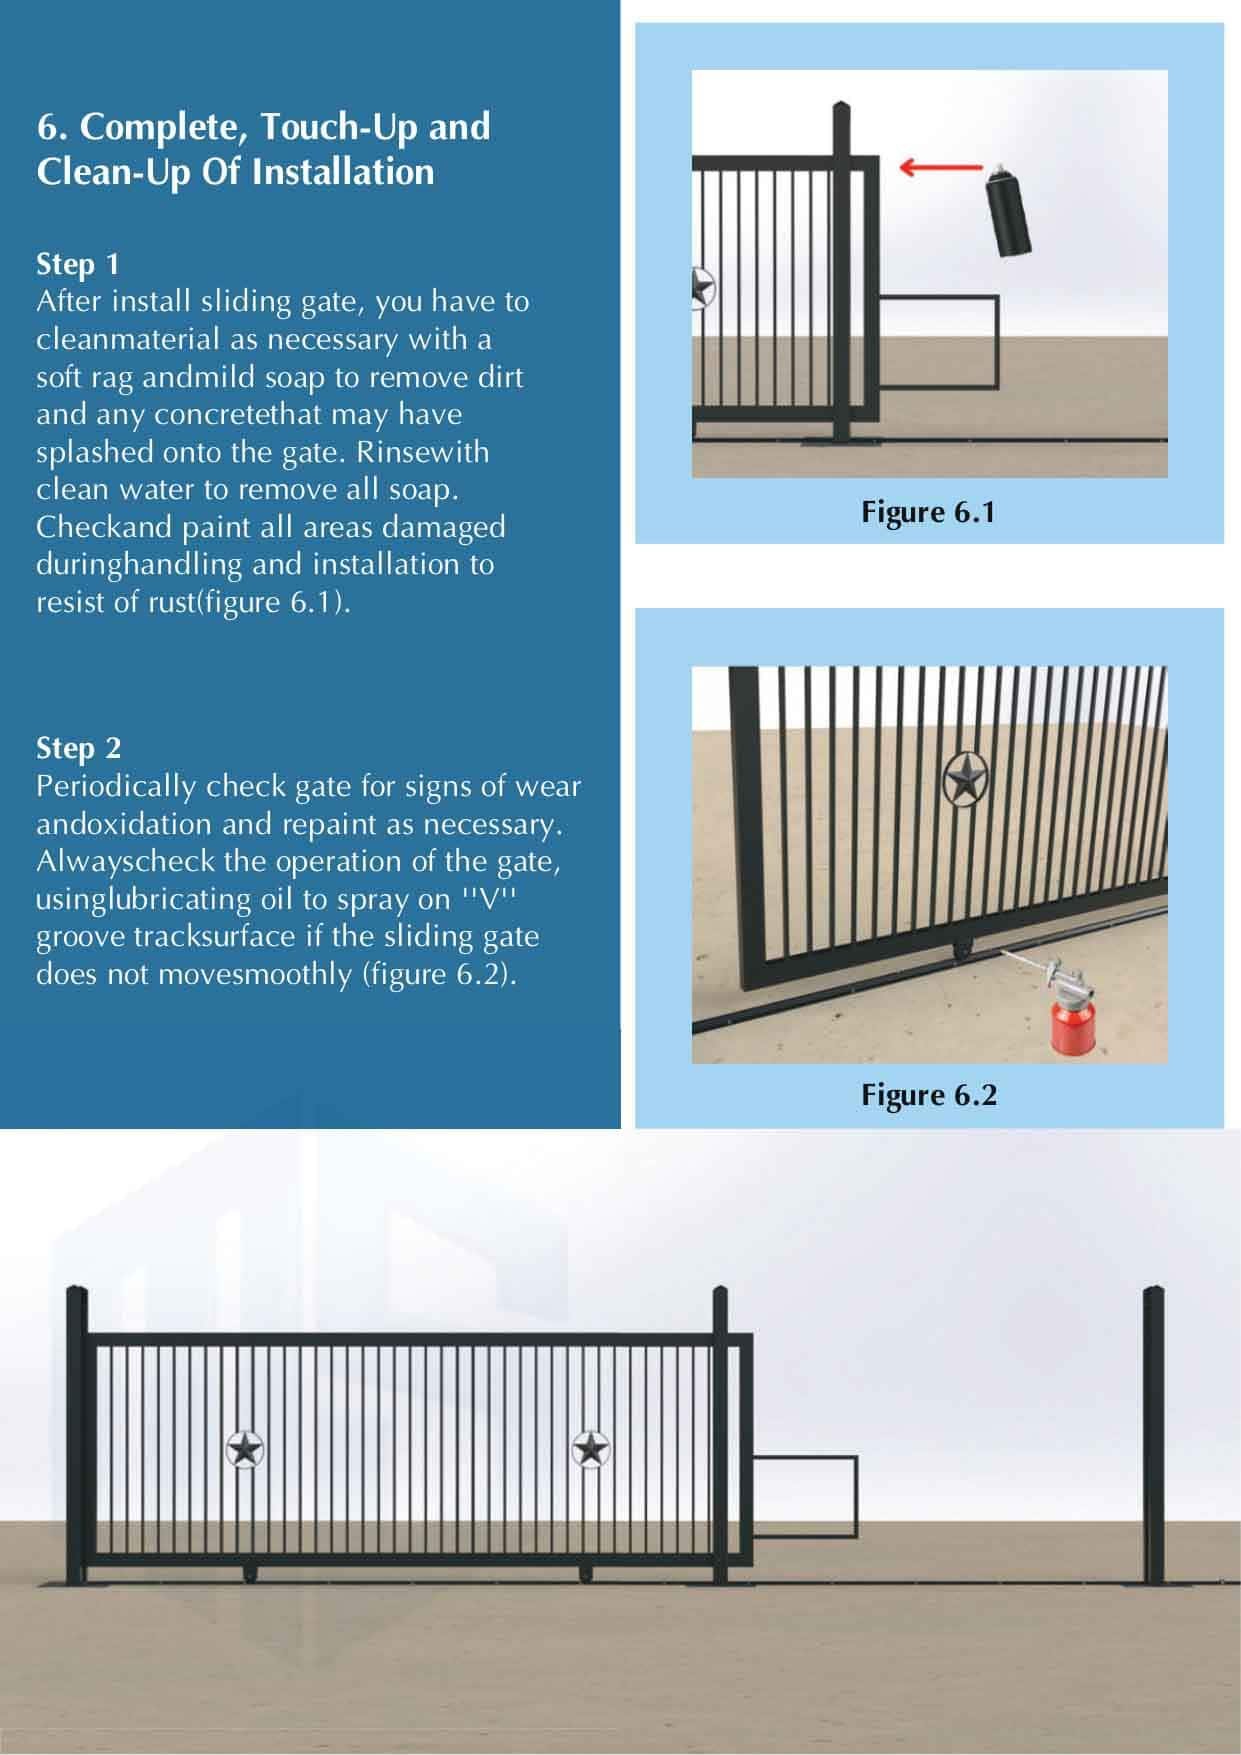
4/ Complete, Touch-Up and Clean-Up Of Installation
Cleaning up after installation is one of the most important steps to take for your new sliding residential gate.
Step 1: After the installation of the sliding residential gate, wipe the material with a soft rag and mild soap as needed to remove dirt and any concrete that may have splashed onto the gate. To remove all soap, rinse with clean water. Inspect and paint all places that have been damaged during handling and installation to prevent rust.
Step 2: Check the gate for indications of wear and oxidation regularly, and repaint as needed. If the sliding gate does not move smoothly, spray lubricating oil on the “V” groove track surface and check its operation.
CHOOSING THE SLIDING DRIVEWAY GATE OPENER
After the installation of the sliding driveway gate, if you want to make your home safer and more secure, you can consider installing a gate opener. With so many options available for sliding gate openers, choosing the right one can be a daunting task. However, Metal Solutions can make this task easier for you. We will point out some criteria you should take into account when choosing the sliding gate opener for your house.
- The size of the gate: Each motor operates safely and efficiently within specified limits (weight/width). Therefore, knowing the metrics is essential
- The temperature range: Gate openers can be a bit more difficult to use in cold or hot temperatures, so before purchasing one, make sure that the device can withstand these weather conditions.
- The power consumption: Electric gate openers require an electrical supply to operate. These openers will consume a certain amount of energy even when they are in use or standby mode.
- Emergency release: Get a system that can be activated in an emergency. With this system, even if there is a power outage, you will be able to control the gates.
- The traction: Automatic gate openers should have a pulling force of 500 to 700 N and motor speeds of up to 11 cm per second.
These are our criteria for an ideal sliding gate opener. Metal Solutions also offers slide gate operators which can meet the aforementioned requirements. If you want to have more information, please feel free to contact us or search on our website: https://msusallc.net/