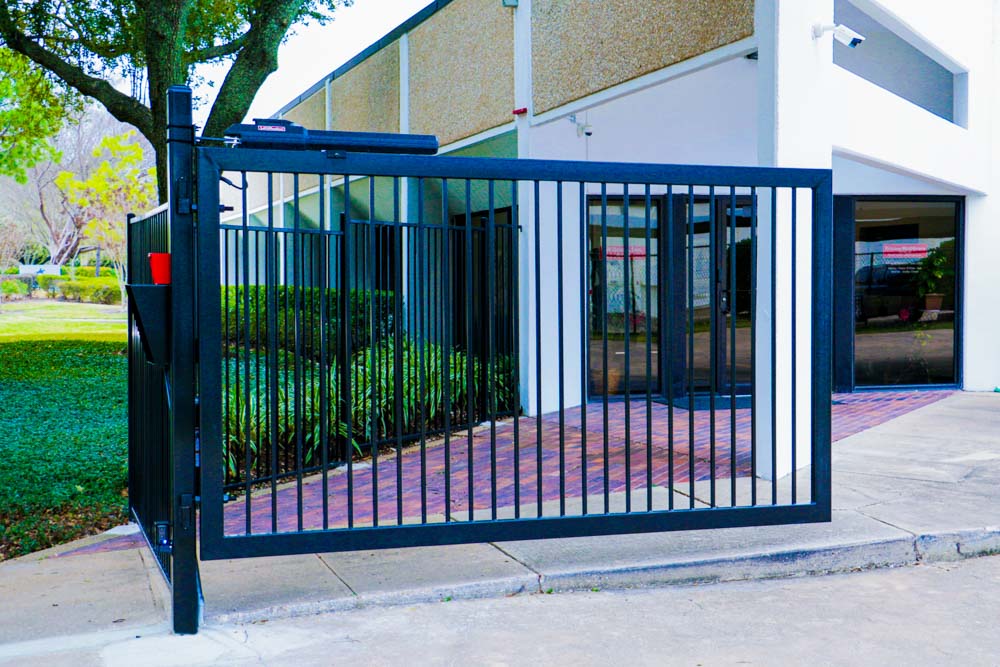


Pedestrian gates, the sentinels of walkways, stand as guardians of homes, businesses, and communities. While their presence exudes an air of security and elegance, their installation can seem like a daunting task. Come to Metal Solutions USA, you can find your ideal wrought iron pedestrian gates that can meet all these requirements. Let us show how simple installing pedestrian gates can be with our step-by-step guide. With just some preparation and patience, anyone will soon know what tools are necessary or which materials are needed to make sure your desired outcome lasts as long as possible.
1. ACCESSORIES NEEDED FOR INSTALLING A PEDESTRIAN GATE
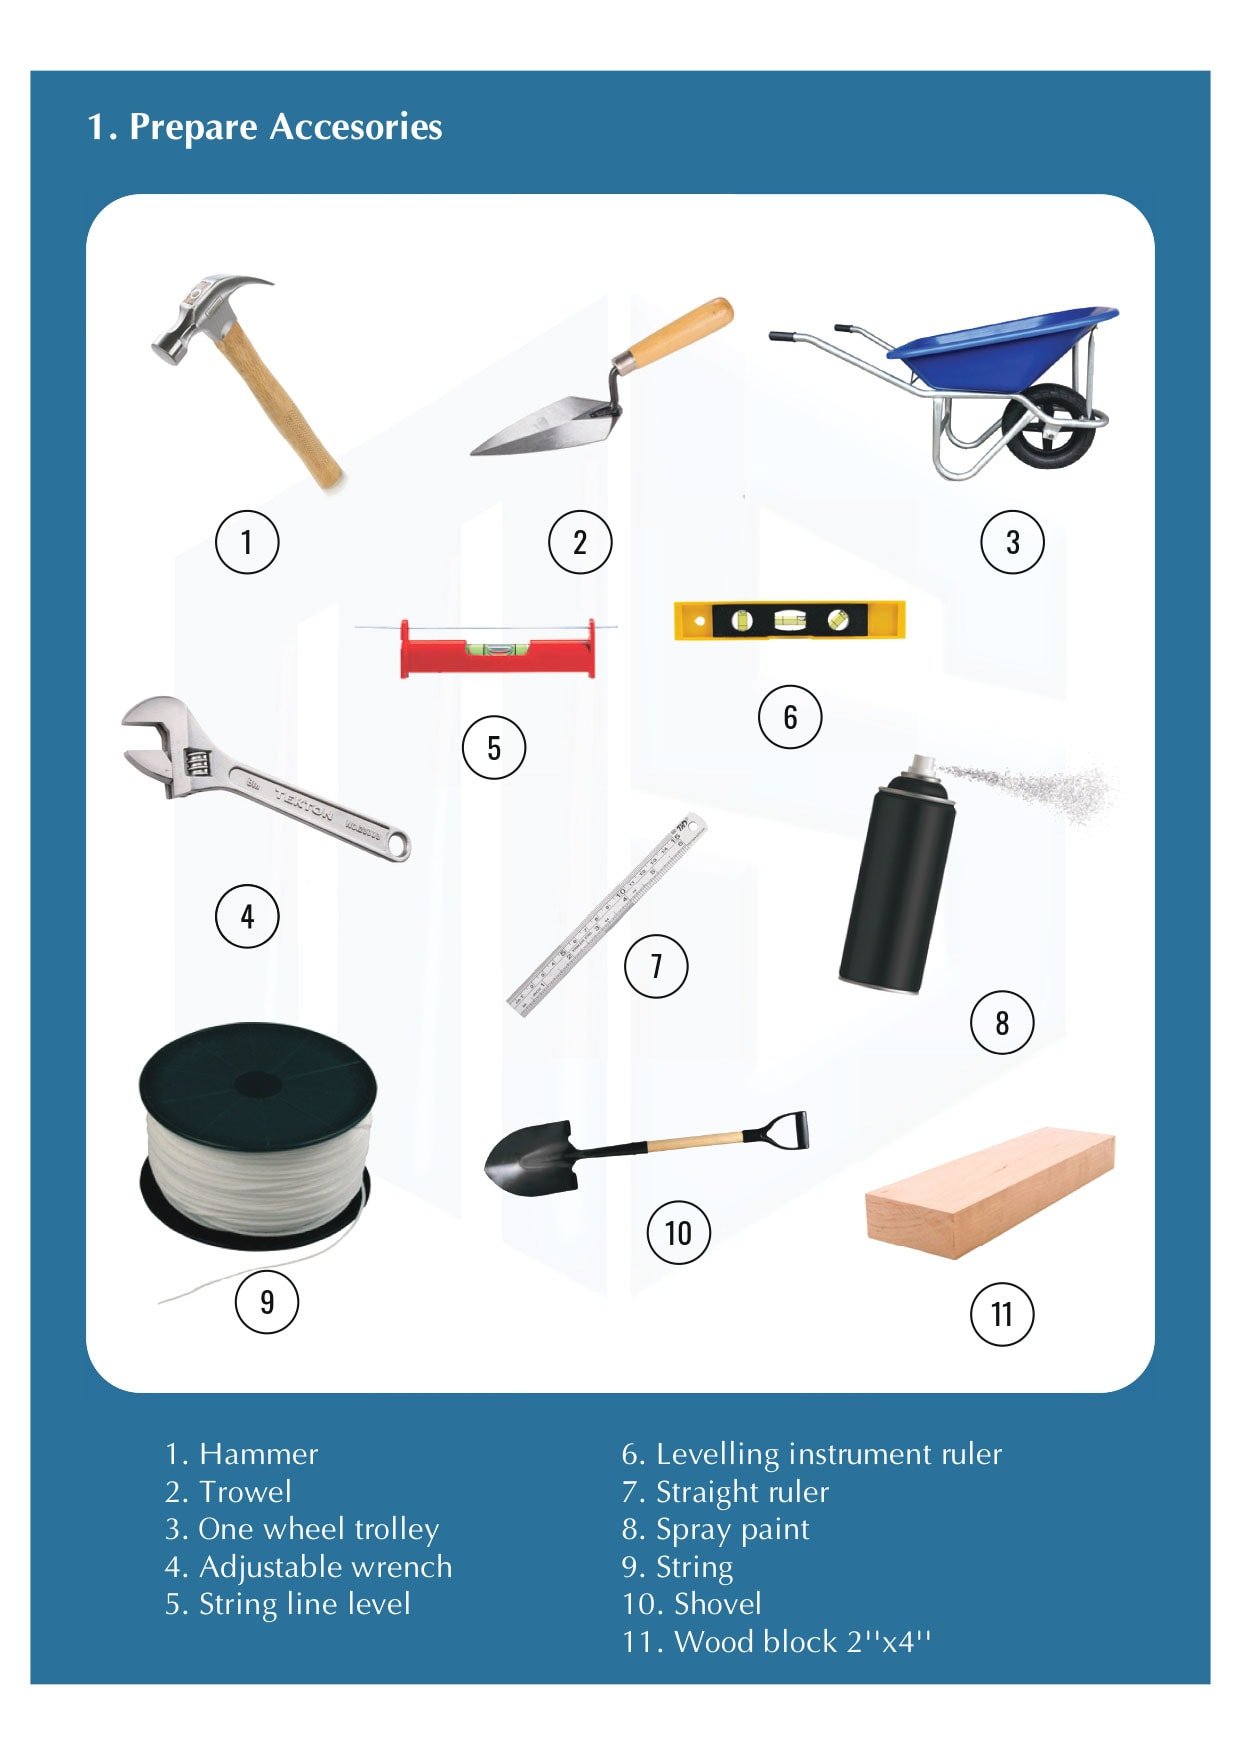
In the process of installing a driveway gate with pedestrian doors, a handful of tools and building materials are needed. The list of things you will need includes:
- Hammer
- Trowel
- One wheel trolley
- Adjustable wrench
- String line level
- Levelling instrument ruler
- Straight ruler
- Spray paint
- String
- Shovel
- Wood block 2”x4”
When you are all set, follow the steps below to get started installing your new gate.
2. INSTALLING A PEDESTRIAN GATE
Installing a wrought iron pedestrian gate can be an easy and interesting project, even for those who are new to home improvement. The instructions from Metal Solutions will help you with the installation of almost any prefabricated metal pedestrian gate.
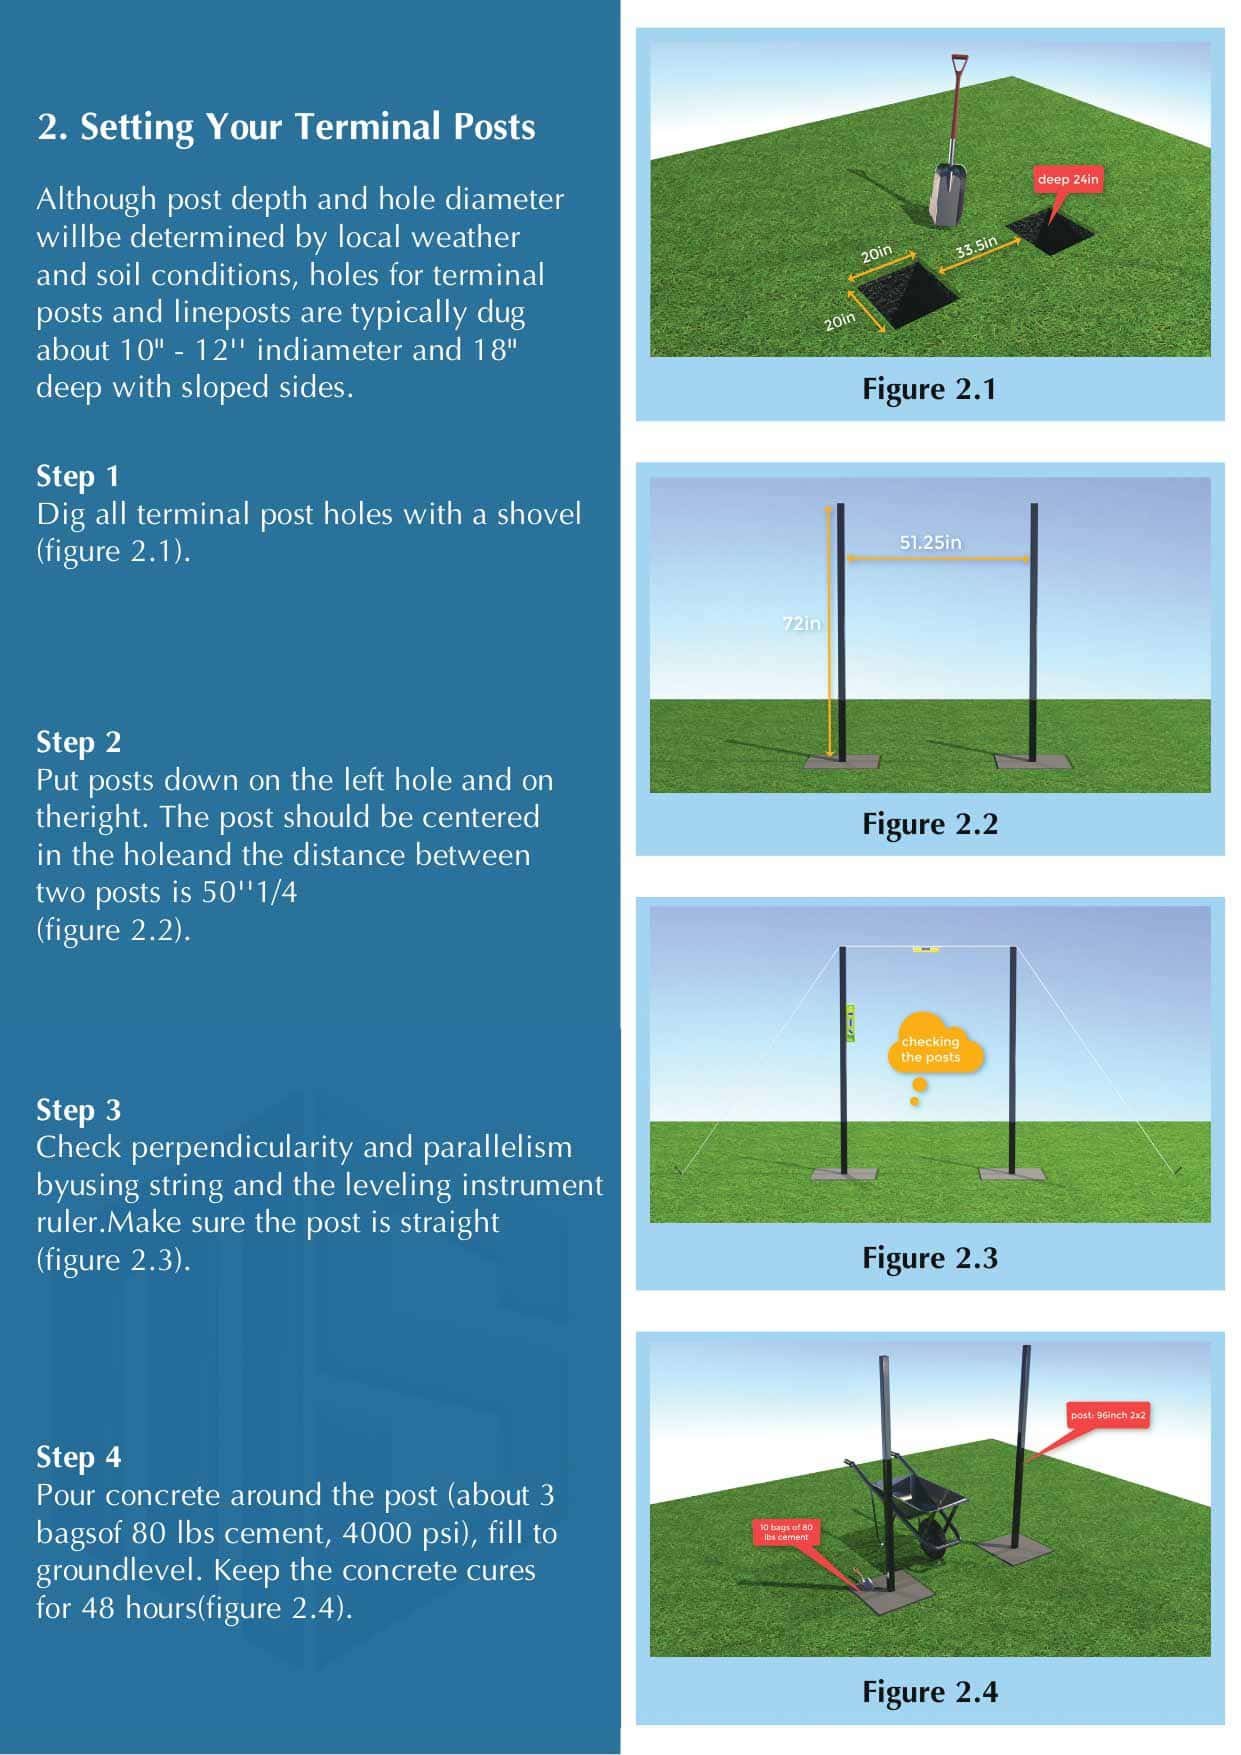
Step 1: SETTING YOUR TERMINAL POSTS
Although most depth and hole diameter will be determined by local weather and soil conditions, holes for terminal posts and line posts are typically dug about 10″ – 12” in diameter and 18″ deep with sloped sides
Firstly, dig all terminal post holes with a shovel
Secondly, set posts on the left hole and the right one to keep the gate balanced when closed and opened up. The post should be placed in the center of the hole. Make sure there are at least 50 inches between two posts for safety purposes
Thirdly, after setting the posts, you should make sure the post is straight, perpendicular to the ground and parallel to the other post. You can do this by using a string in addition to leveling the instrument ruler
Fourthly, pour concrete around the post (about 3 bags of 80 lbs cement-4000 psi), and fill to ground level. You can cover that place up with dirt or sand to keep people from walking across and prevent cars from driving over top. Keep the concrete cures for 48 hours.
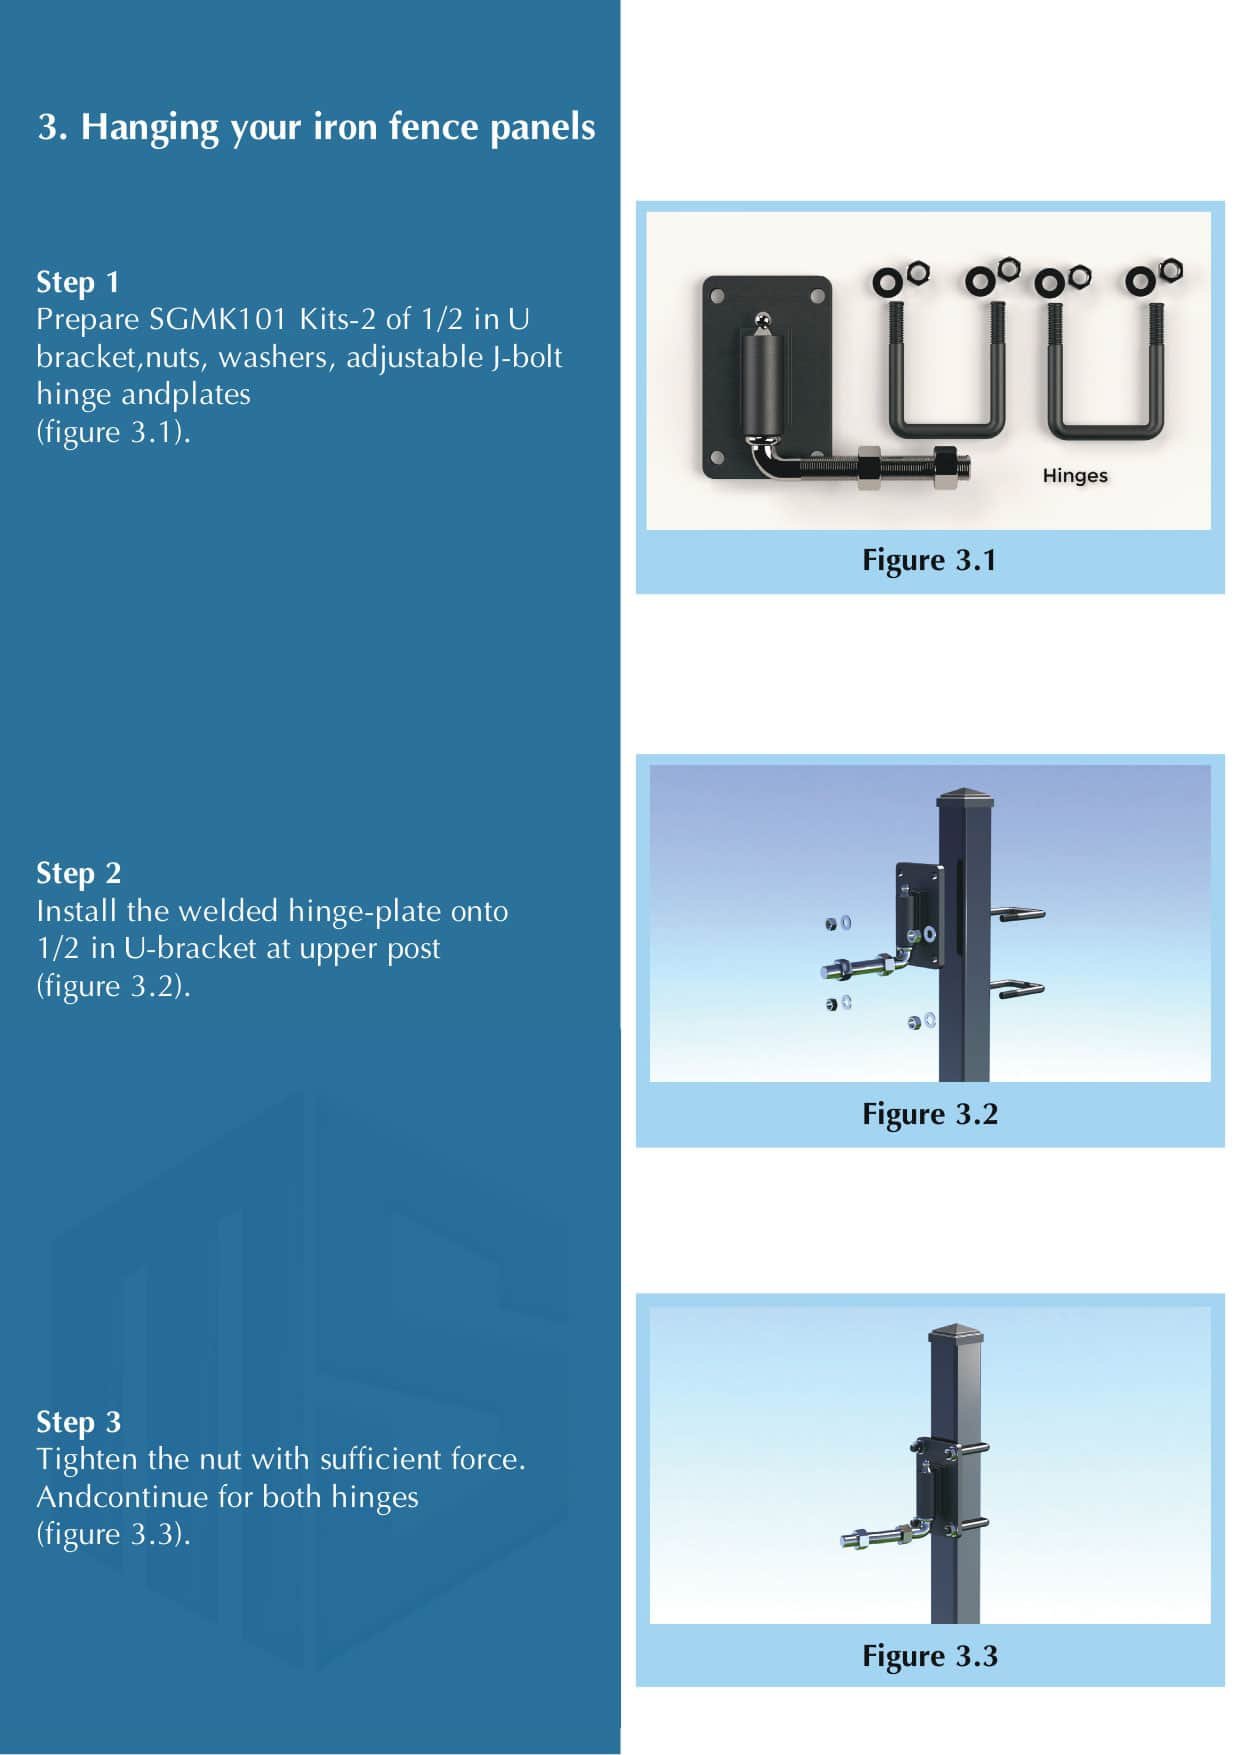
Step 2. HANGING YOUR IRON FENCE PANELS
Installing a driveway gate with pedestrian doors is not difficult, but it does require some planning.
First of all, you should prepare SGMK101 Kits-2 of 1/2 in U brackets, nuts, washers, adjustable J-bolt hinges, and plates. In the next step, you will install the welded hinge plate onto 1/2 of the U-bracket at the upper post. Finally, tighten the nuts with sufficient force.
Installment may take some time so plan carefully.
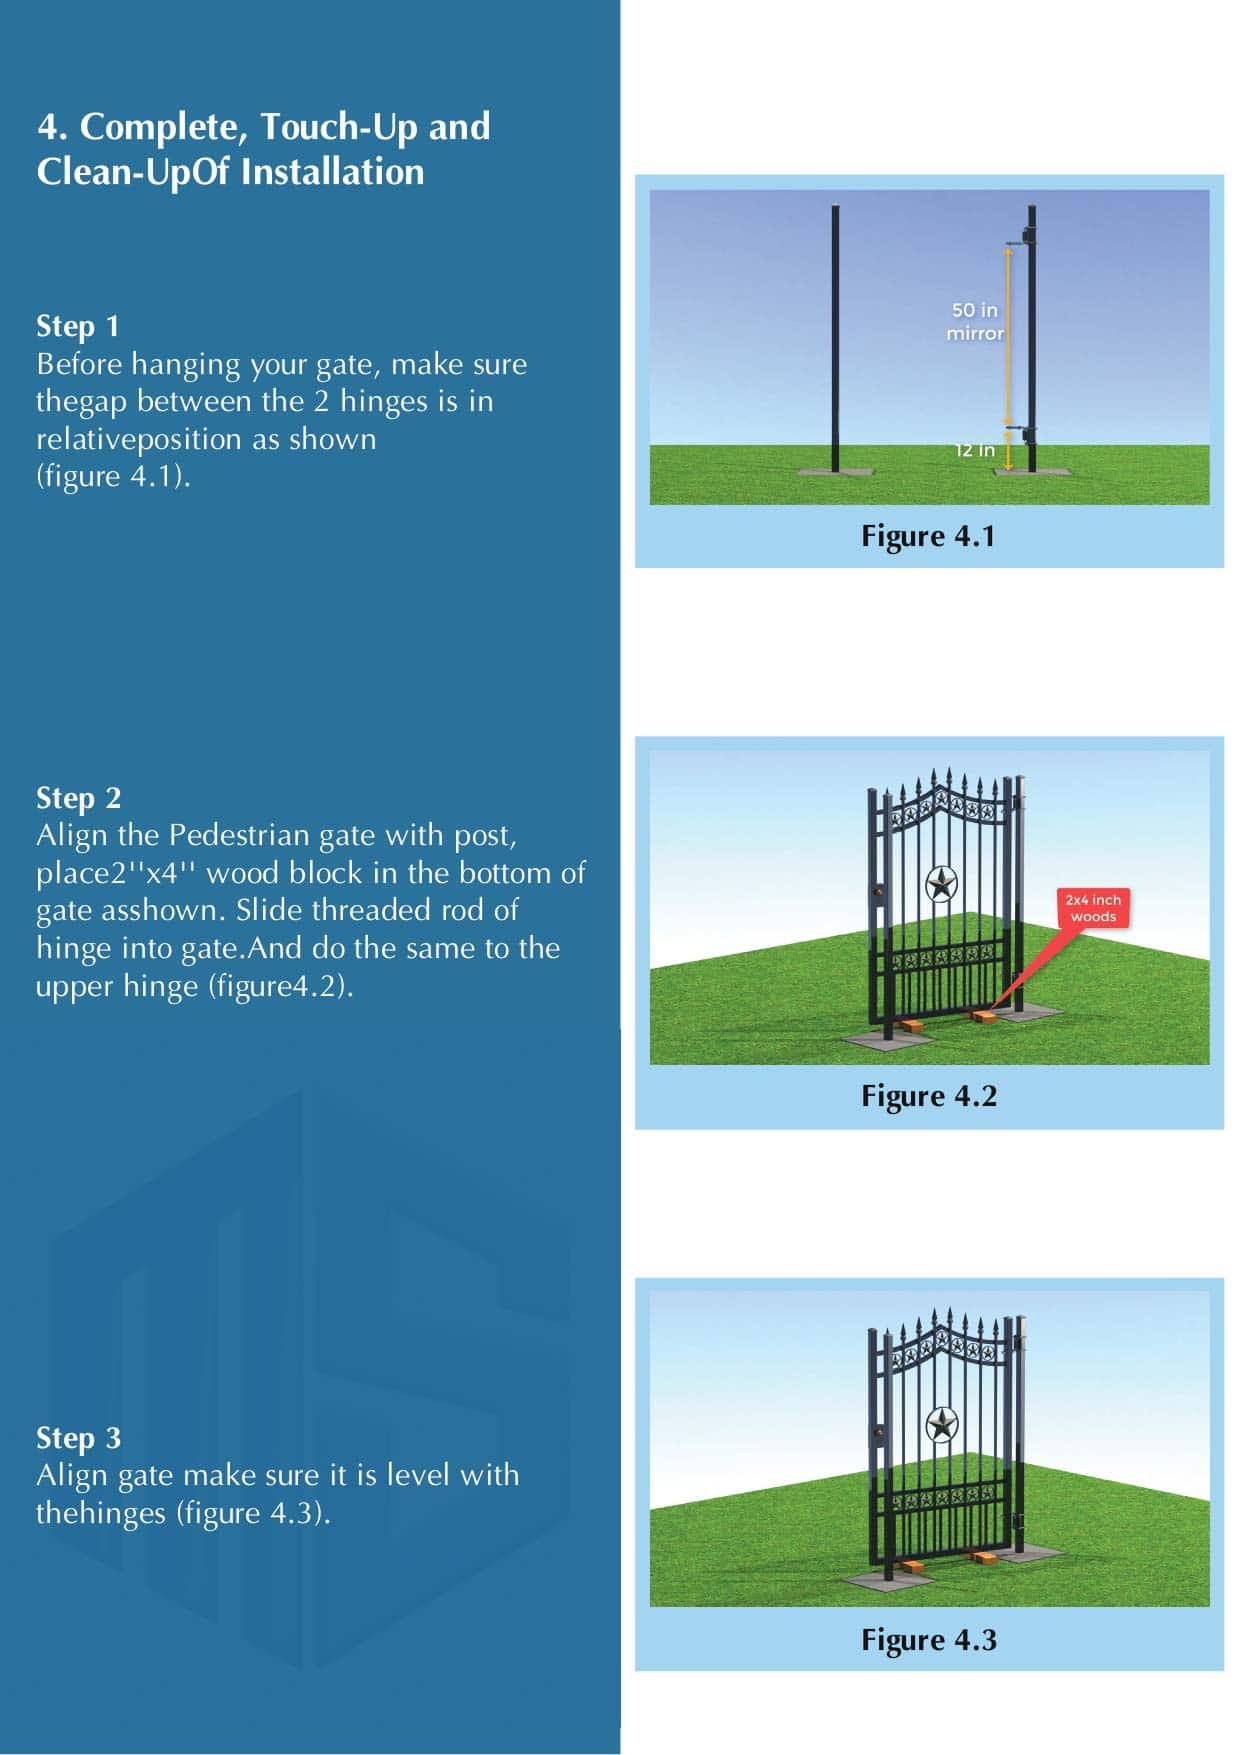
Step 3. COMPLETE, TOUCH-UP AND CLEAN-UP OF INSTALLATION
Before hanging your gate, make sure the gap between the 2 hinges is in relative position as shown in the figure
Align the Pedestrian gate with the post, make sure to place a 2”x4” wood block in the bottom of the gate before hanging it up. Once done adjusting, slide the thread rod of the hinge into the gate, and do the same to the upper hinge.
Careful adjustments are needed to check whether your gate is aligned properly. You should ensure that the gate is level with the hinges.
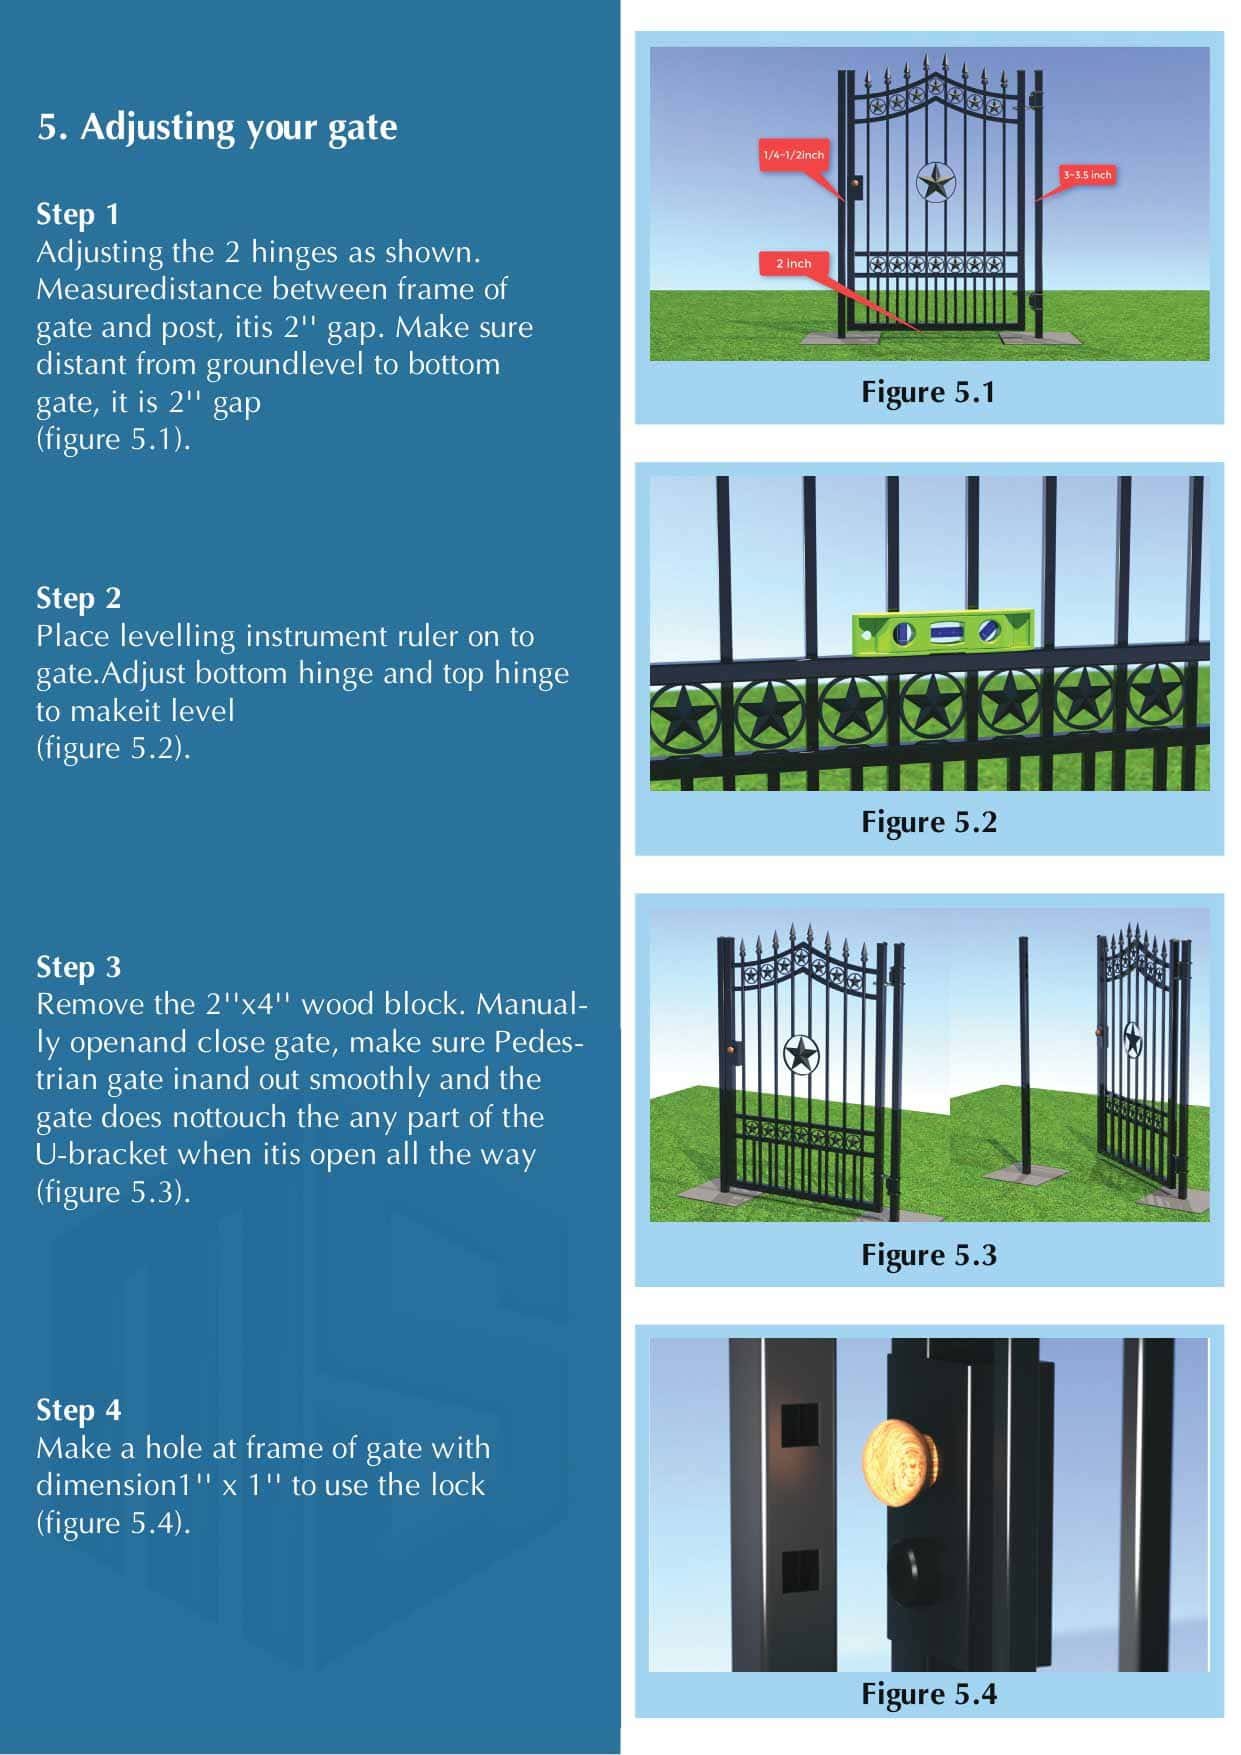
Step 4: ADJUSTING YOUR GATE
Adjusting the 2 hinges as shown in the figure. To do this step, you will need to measure the distance between the frame of the gate and the post, it is a 2” gap. Make sure there is a 2″ gap between the ground level and the bottom gate.
Place the leveling instrument ruler onto the gate. Adjust the bottom hinge and top hinge so that they are even with each other.
To adjust your pedestrian gate, remove the 2”x4” wood block. Open and close it manually so that you can make sure it is done smoothly without touching any part of the U-bracket when it is open all the way
Make a hole at the frame of the gate with dimension 1″x1″ to use the lock
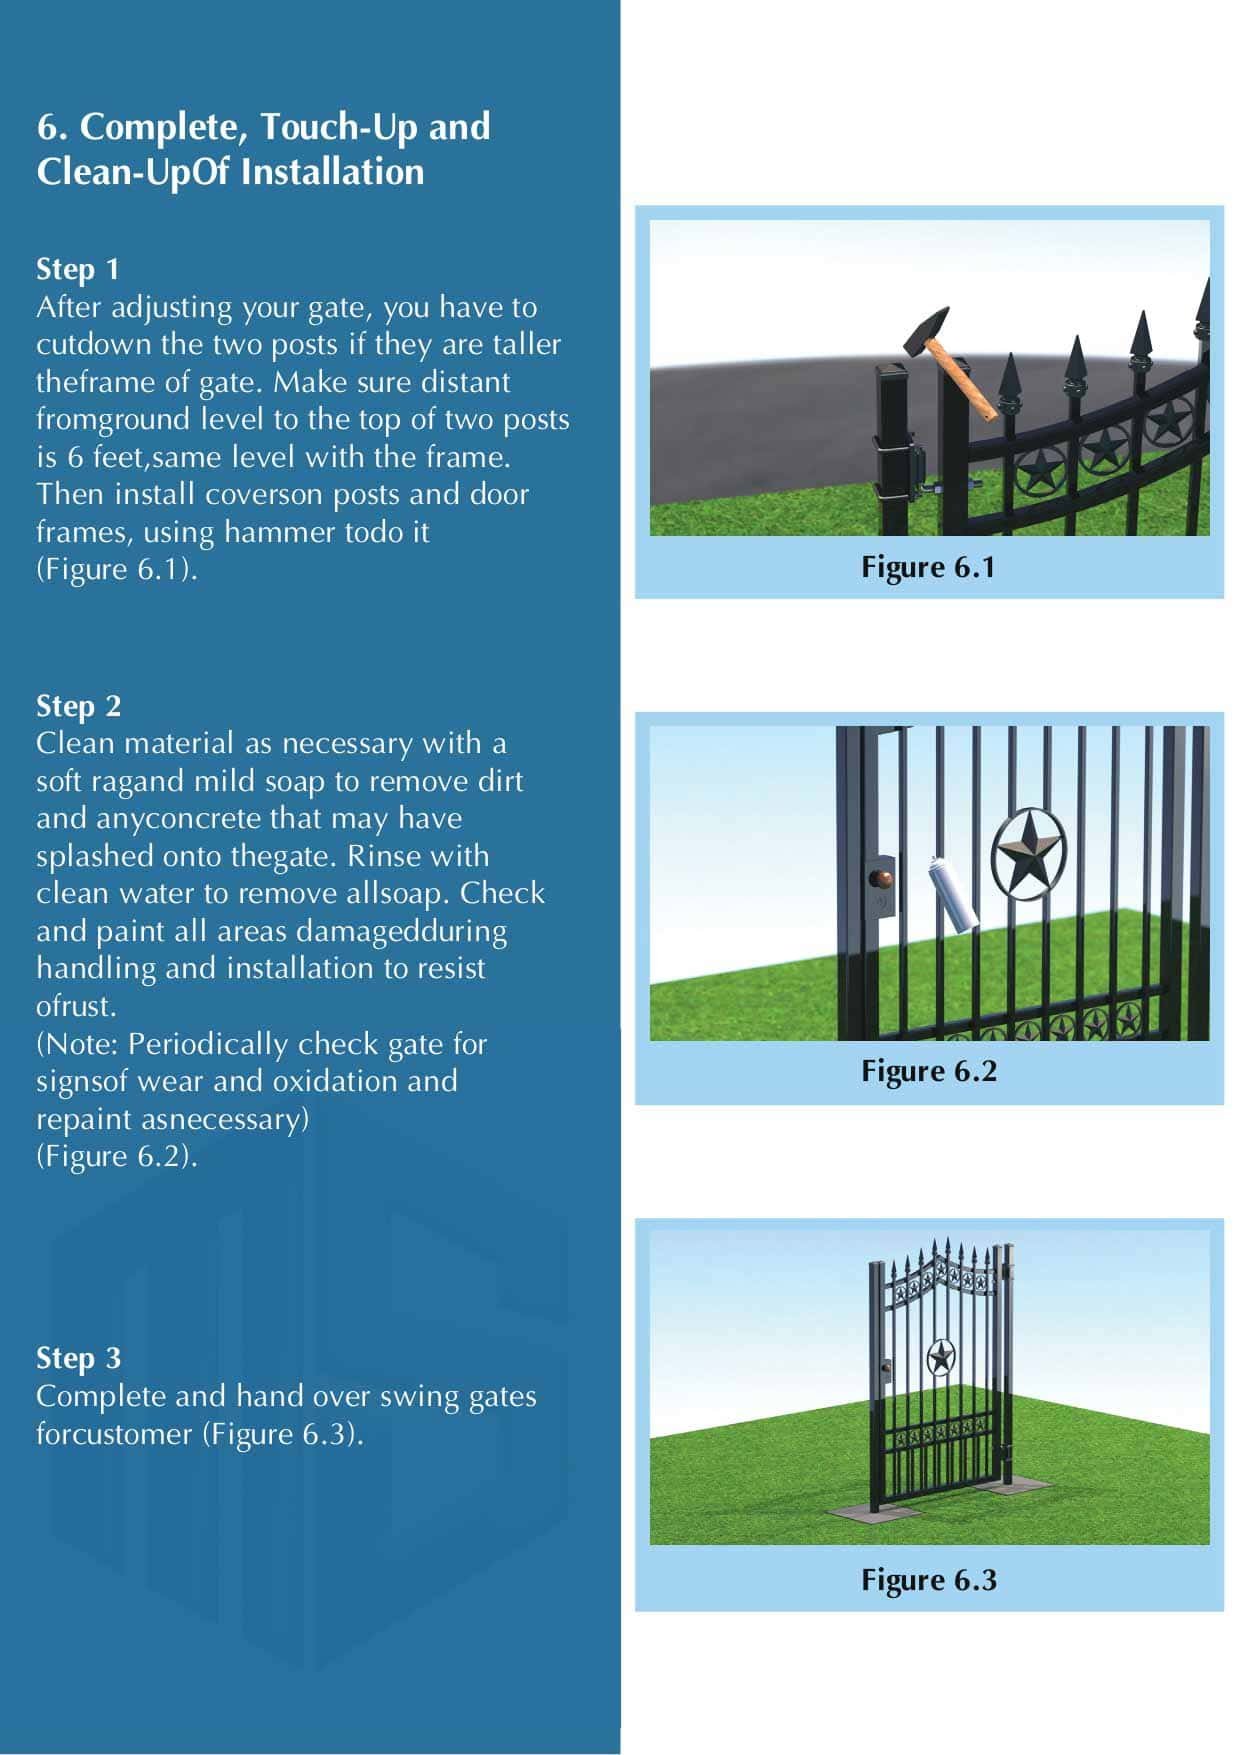
Step 5. COMPLETE, TOUCH-UP, AND CLEAN UP-OF INSTALLATION
When the installation is complete, it is important to ensure that everything aligns and looks tidy.
After adjusting your pedestrian gates, you have to cut down the two posts if they are taller than the frame of the gate. Make sure the distance from ground level to the top of the two posts is the same level as the frame (6 feet). Once this has been completed install covers on posts and door frames. You should use a hammer to do this step
To remove dirt and any concrete that may have splashed onto the gate, clean it with a soft rag and mild soap as needed. Thoroughly rinse with clean water. Moreover, to prevent rust, check and paint all places that have been damaged during handling and installation.
(Note: Check the gate for signs of wear and rust regularly and repaint if necessary.)
Finally, complete the swing gates for customers and hand them over.
Installing a gate is an important task that can help keep your family safe. These aforementioned steps are the instructions of Metal Solutions on “How to install a pedestrian gate”. It may seem like there are many steps, but with these instructions from Metal Solutions, you will be able to do it successfully in no time at all! Not only for the assembly of the pedestrian gate, but this instruction may also be helpful when installing other things as well
Even for those who have little experience in home improvement, installing a wrought iron gate is not too difficult. To get more tips on how to install your metal pedestrian gate, check out our next post!